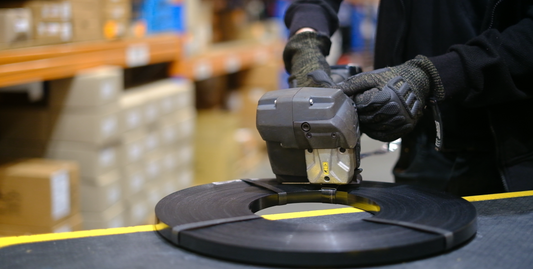
Using the BXT3 easy, using part of the manual we explain below how the BXT3 is used. The BXT3 is a battery powered strapping tool. for use on PET and Polypropylene strapping
Preconditions
● The tool is adjusted to the width of the strap to be used (Section 5.3).
● The charged battery is inserted
● The desired operating mode is set . In this description it is assumed that the selected operating mode (default mode) is “SEMI” (semi-automatic). ● Desired tension force is set (Section 4.3).
● Desired welding time is set
► Place the strap around the packaged goods.
► Grasp the straps at the top of the goods with your left hand so that:
● The straps lie one above the other.
● The beginning of the strap lies underneath and should project 15 cm (6”) beyond your hand.

Take the tool with your right hand.
► Lift rocker lever. – Rocker of the tensioning device opens.
► Insert overlaid straps up to the end stop. The strap coming from the dispenser lies above.
► Release rocker lever.
– The straps are clamped in the tensioning device.
– The beginning of the strap should project approx. 5 cm (2”). If the strap is not inserted completely, the strap guide indicator shows a red field. Insert the strap completely. The strap guide indicator is black.
► Remove hands from the straps before tensioning!

WARNING Strap tensioning or strapping, danger of jamming and crushing Do not place hands or other body parts between the strap and the packaged goods during the strapping process.
Ensure that there are no other persons in the hazard zone (
For an emergency stop in the case of danger (trapped person):
● To release the strap tension (before welding), actuate the rocker lever. In operating mode AUTO, also the tensioning or welding button can be pressed again.
● After welding, cut the strap using a tool (strap cutter).
CAUTION When being tensioned the strap may break and whip out. Do not stand in line with the strap while it is being tensioned. Wear eye protection.
► Press the tensioning button and hold it down until the set tension force has been reached. The tension speed is variable and depends on the pressure on the tensioning button (MAN/SEMI operating mode).
Stopping/continuing the tensioning process: Release / press the tensioning button again.
– The following information is displayed: The set tension force and the status indicator bar with the reached tension force in relation to the set tension force.
– The tensioning process is ended when the status indicator bar has been completely filled.
► The tensioning button can now be released.
– The straps are now automatically welded and the upper strap is cut off.
– The following information is displayed: The set welding time and the status indicator bar.
– The welding process is ended when the status indicator bar has been completely filled (1.) After this the cooling time begins (2.). At the end of the cooling time an acoustic signal sounds and the operating panel lights up green for a second.
● Welding without strap tension: Press the tensioning button briefly, then press the welding button (Section 3.1, item 2).

After the display turns green and an acoustic signal sounds the cooling time is ended. Lift rocker lever.
– Rocker of the tensioning device opens.
After lifting the rocker lever, do not re-tension (do not press the tensioning button any more).
► Swivel the tool to the right away from the strapping. WARNING If the tool is removed too early the display turns orange with error code and an acoustic signal sounds repeatedly

► Carry out a visual sealing inspection
Checking the seal WARNING Never transport or move packaged goods with improperly performed strapping / weld sealing - serious injuries may result. Perform sealing check after each strapping.
► Perform sealing check by visual inspection.

1 Good seal (the entire sealing area has been cleanly welded, without excess material being forced out sideways).
2 Poorly welded seal (weld not over entire sealing area), welding time too short.
3 Poorly welded seal (excess material has been forced out sideways), welding time too long. In the case of straps with poorly welded seals:
► Check the welding time setting (Section 4.5).
► Strapping with poorly welded seals must be performed again.
► Check strap type (Section 7).
► If good welding is not achieved, the tool must be checked by an authorized service center.


