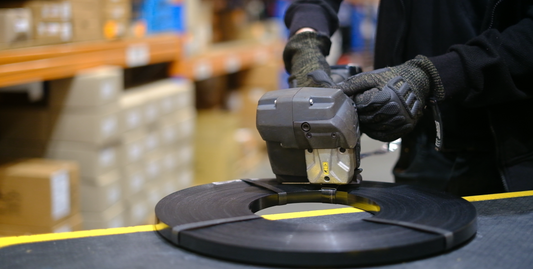
In This guide we will be showing you how to use a manual steel strapping tensioner.
The items you need to tension steel strapping with a manual tensioner are:
1. Manual steel strapping Tensioner
2. Steel Strapping
3. Snap on Seals made for the same width of strapping
4. A sealer made for the same width of strapping and seals
5. A dispenser isn’t required, but recommended when using steel.
You can watch our video guide where we follow the below steps, by using our detail guide below or we have also made a PDF guide for using a manual tensioner at the end of the page you can download or printout for your convenience.
1 Putting the strap around the pack.

First go over the package with the strapping. Now some people cut the strap off from the strapping dispenser first so its loose, we recommend keeping the strapping attached to the roll, so you don’t have any wastage.
You can go under the pack first, but if you do this you will endup with the strap curling into your face. So we always recommend go over the pack with your strapping.
Going over the pack does make it more awkward to mount the tensioner in step 3, so for this reason you may want to go underneath the pack or once the strap is around the pack, or go over and switch to the opposite side of the dispenser to mount the tensioner.
2 Putting the strapping in the tensioner.
Get both bits of strapping together, so that the strap with no end going to the dispenser is on top. And the cut strap underneath.
When you put the strap in the tensioner its going to tension with the strap with the excess coming out of the front of the tensioner. As per the diagrams below. As we went over first you will need to have the tensioner handle facing away from you.
Squeeze the tensioner handle down, so the feed wheel lifts up and place both straps into the tensioner.
Ensure the strap is fully in the tensioner and the outer guide has come down around the strapping.
Tensioners take multiple sizes of strapping, typically they will take 12, 16 and 19mm strapping and then 19 and 32mm strapping.

3 Tension the strapping
Crank the leaver back and forth and tension the strap until the desired tension for you goods and strapping.
Once finished the handle may not be in an optimal position to apply a seal, so press the pawl button to move the handle backwards if needed, this wont release tension on the strap.

4 Apply the seal to the strapping
Using Snap on seals, click the seal onto the strapping with the smooth side facing, up, attaching the seal closer to the tensioner should be easier as the tensioner raises up the strapping.

6. Sealing the strap
With your sealer open the sealer all the way up and place it over the seal, it should be centred so when it clamps it clamps on the seal not half off the seal.
Squeeze the sealer tight to seal the seal.
The sealer should indent the seal and sealer so you should be able to see the metal strap cut into the seal, if you can see this the sealer jaws maybe too blunt and replacement is recommended.


7. Removing the tensioner
To remove the tensioner from the strapping, if you didn’t use the pawl to release the handle earlier, press the pawl and move the handle so its on top of the base frame of the tensioner, you can now squeeze the handle down, and slide the tensioner out.

8. Removing the excess strap.
Now you could cut the excess strap coming of the dispenser as close to you can at the seal. HOWEVER, this creates a dangerous tab of steel that sticks out. So when using SO seals and a manual tensioner, we recommend metal fatiguing the strapping off at the seal. To do this bend the strapping as close to you can as 180deg over the seal, then back and forth. So the bend is at the seal. It should break within 10 bends of bending the steel back and forth.


And there you have it, you have strapped using a manual steel strapping tensioner. We have also made this into a printable PDF for your convenience.
If you’re in Australia overseas and found this guide help a like or a rating goes along way to helping us thanks.


